
Augmented Reality (AR) is transforming the way we share experiences, and Stories AR makes it easier than ever to create stunning AR photos. Whether you’re a marketer, a storyteller, or simply someone who loves creativity, this tool allows you to bring photos to life with interactive and immersive elements.
In this guide, you’ll learn how to create augmented reality photos using Stories AR. By following these steps, you’ll master the process and discover how AR photos can captivate your audience.
Table of Contents
What is Stories AR?

Stories AR is a user-friendly platform designed for creating augmented reality content. With its drag-and-drop editor, customizable templates, and powerful tools, anyone can create interactive AR photos without needing technical expertise.
Why Use Stories AR for Augmented Reality Photos?

Here are some reasons why Stories AR is a great choice for creating AR photos:
- Easy to Use: No coding skills required.
- Customizable Templates: Save time and effort.
- Creative Freedom: Add animations, text, and multimedia to your photos.
- Mobile-Friendly Content: Optimized for mobile devices, ensuring a seamless experience.
- Versatile Applications: Perfect for marketing, personal storytelling, and social media.
Step-by-Step Guide: How to Create Augmented Reality Photos with Stories AR

Step 1: Sign Up for Stories AR
- Visit the Official Website: Head to the Stories AR website.
- Create an Account: Sign up using your email or social media account.
- Log In: Access your dashboard and explore the available features.
Step 2: Select a Template
- Browse Templates: Stories AR offers a variety of templates tailored for AR photos.
- Choose the Right Template: Pick one that matches your project or brand.
- Start Customizing: Click on the template to open it in the editor.
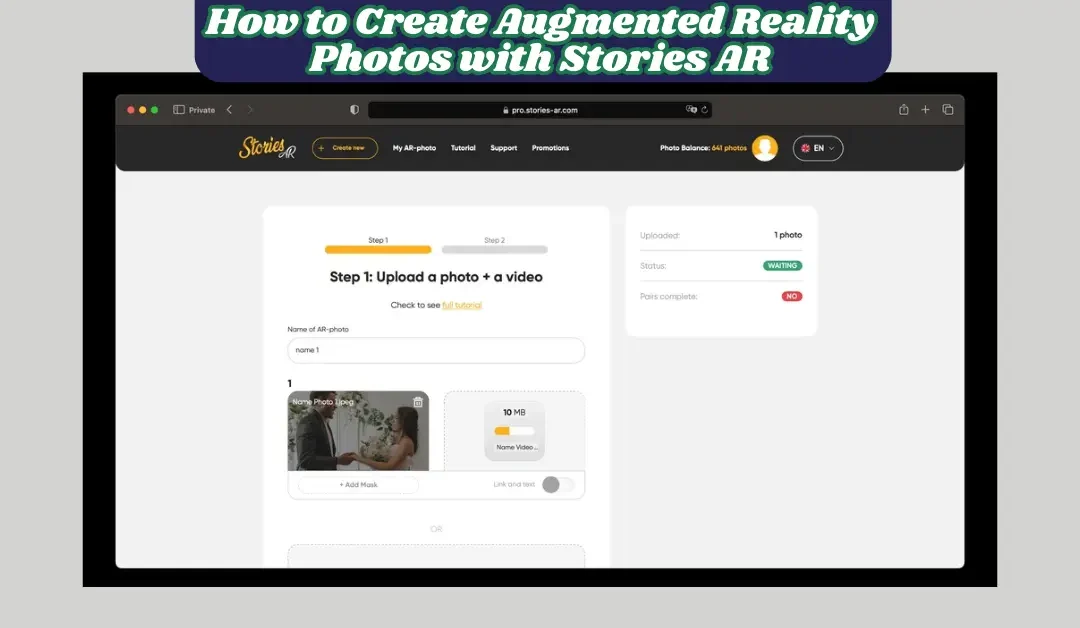
Step 3: Upload Your Photo
- Click on Add Image: Upload the photo you want to turn into an AR masterpiece.
- Adjust the Photo: Use the resizing and positioning tools to place your image perfectly.
Step 4: Add Interactive Elements
- Text Overlays: Add captions, titles, or descriptions to enhance your photo.
- Animations: Bring your photo to life with moving elements.
- Multimedia Integration: Embed videos, sound effects, or clickable links for a richer experience.
Step 5: Preview Your AR Photo
- Use the Preview Feature: See how your AR photo looks in real-time.
- Test on Mobile Devices: Stories AR ensures that your content is optimized for mobile viewing.
Step 6: Publish Your AR Photo
- Save Your Project: Ensure all elements are in place.
- Generate a Link or QR Code: Stories AR provides sharing options to make your content easily accessible.
- Share on Social Media: Post your AR photo on platforms like Instagram, Facebook, or Twitter.
Make learning more engaging with augmented reality visuals.
5. Event Promotion
Use AR photos to create buzz for events, product launches, or celebrations.
Why Choose Stories AR for Augmented Reality Photos?

Stories AR is a versatile platform designed for everyone. Whether you’re a beginner or a Tips for Creating Stunning AR Photos
- Keep It Simple: Avoid overcrowding your photo with too many elements.
- Focus on Storytelling: Use AR to tell a compelling story or convey a message.
- Test Before Publishing: Always preview your content to ensure it works seamlessly.
- Stay On-Brand: Match the colors and design elements to your brand identity.
- Engage Your Audience: Add interactive features that encourage user interaction.
Applications of AR Photos

1. Marketing Campaigns
Boost engagement with AR-enhanced ads and promotions.
2. Social Media
Stand out by sharing unique AR photos on platforms like Instagram and TikTok.
3. Storytelling
Create interactive stories for personal or professional use.
4. Education
professional, its intuitive tools make it easy to create impactful AR photos. Here’s why you should choose Stories AR:
- Ease of Use: Designed for non-technical users.
- Creative Tools: Offers animations, multimedia, and interactive elements.
- Cost-Effective: Affordable pricing plans for individuals and businesses.
- Time-Saving Templates: Pre-designed layouts to speed up the process.
Call to Action
Ready to create your own AR photos?
Try Stories AR Now and unlock the power of augmented reality. Whether you’re a marketer, educator, or creative enthusiast, Stories AR makes it simple to bring your ideas to life.
Frequently Asked Questions (FAQs)
Q1: Do I need coding skills to use Stories AR?
No, Stories AR is designed for users of all skill levels, requiring no coding experience.
Q2: Can I use Stories AR on mobile devices?
Yes, Stories AR is optimized for mobile, ensuring a seamless experience.
Q3: Is there a free trial available?
Yes, Stories AR offers a free trial to explore its features before committing to a plan.
Q4: Can I share my AR photos on social media?
Absolutely! Stories AR makes it easy to share your creations via links, QR codes, or direct social media uploads.
Q5: How can I track the performance of my AR photos?
Stories AR provides an analytics dashboard to monitor engagement and performance.
Conclusion

Creating augmented reality photos has never been easier, thanks to Stories AR. With its beginner-friendly interface, powerful tools, and creative features, you can produce stunning AR content in no time. Follow this guide to get started and impress your audience with interactive and immersive visuals.
Don’t wait—start your augmented reality journey today!
Recent Comments