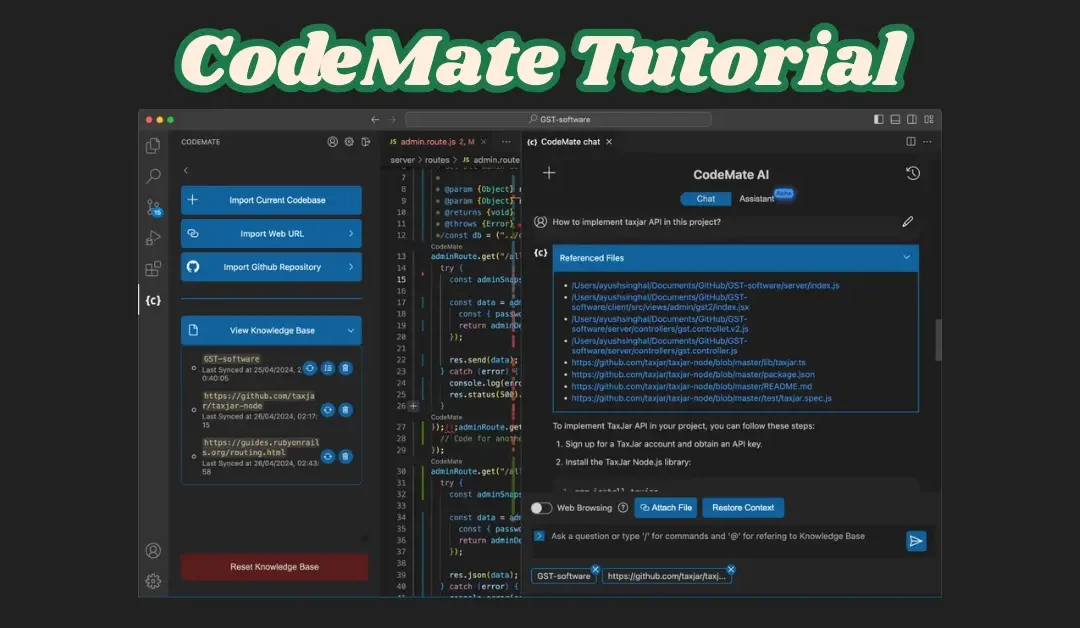
CodeMate is an AI-powered coding assistant that helps developers write, debug, review, and optimize their code more efficiently. Whether you are a beginner or an experienced programmer, CodeMate can save you time by offering real-time code suggestions, generating test cases, and even conducting security audits.
In this tutorial, we will guide you through the essential steps to using CodeMate effectively, from setup to advanced features.
Table of Contents
Key Features of CodeMate
Before diving into the tutorial, here are some of CodeMate’s standout features:
- AI-Powered Code Assistance – Write and debug code in multiple programming languages with AI.
- Codebase Search & Chat – Search through your codebase, GitHub repositories, and web URLs with AI-powered chat.
- Code Review Reports – Identify security vulnerabilities and coding best practices.
- Inline Editing & Refactoring – Modify and refactor code directly inside your editor.
- Automated Test Case Generation – Generate unit and functional test cases with AI.
- Cross-Platform Support – Use CodeMate via VS Code extension, web app, or CLI tool.
Step 1: Setting Up CodeMate
1.1 Creating an Account
To start using CodeMate, sign up on their official platform and choose a pricing plan that fits your needs. If you’re using AppSumo, you can activate a lifetime deal.
1.2 Installing the CodeMate Extension
If you’re using VS Code, install the CodeMate AI extension from the marketplace. You can also use it as a web application or CLI tool.
1.3 Connecting Your Codebase
CodeMate allows you to connect:
- Local code repositories
- GitHub repositories
- Web URLs for documentation
This enables AI-powered code searches and better contextual understanding of your projects.
Step 2: Writing and Debugging Code
2.1 Generating Code with AI
- Open your code editor and type a comment describing what you want.
- CodeMate will generate the required code snippet in the selected language.
- Modify and refine the AI-generated code as needed.
2.2 Debugging Code with CodeMate
- Highlight a section of code that needs debugging.
- Ask CodeMate to analyze the errors.
- It will suggest fixes and optimizations based on best practices.
Step 3: Performing a Code Review
3.1 Running a Security & Performance Audit
- Use CodeMate’s Review Reports feature to scan your codebase.
- It will flag security risks, inefficiencies, and areas for improvement.
- Review the suggested changes and apply fixes with one click.
3.2 Adding Inline Documentation
- Generate docstrings and comments automatically.
- This improves readability and maintainability of your code.
Step 4: Generating Test Cases
4.1 Automated Unit and Functional Testing
- Select a function or module in your code.
- Ask CodeMate to generate test cases.
- Run the test cases and validate results.
This ensures that your code is bug-free before deployment
Step 5: Using CodeMate Chat for Assistance
5.1 Searching Your Knowledge Base
- Use the chat feature to find code snippets, explanations, or past references.
- Chat with your codebase like you would with ChatGPT, but with context from your projects.
5.2 Getting Real-Time Help
- If you’re stuck on a problem, describe it in natural language.
- CodeMate will suggest potential solutions based on your project’s context.
Step 6: Optimizing Your Workflow
6.1 Integrating wih GitHub
- Link your GitHub account to enable seamless version control and collaboration.
- This lets CodeMate analyze and improve your repository files.
6.2 Using the CLI Tool
- If you prefer working from the command line, install CodeMate’s CLI tool.
- Run commands to generate code, debug errors, and review code directly from your terminal.
Conclusion
Ready to try CodeMate? Sign up and start coding smarter today.


Recent Comments