

GetResponse is one of the most popular email marketing platforms, offering an array of features that help businesses create, manage, and optimize email campaigns. Whether you’re a small business owner, a marketer, or someone looking to dive into email marketing, GetResponse offers tools that can take your marketing efforts to the next level.
In this guide, we’ll walk you through everything you need to know about email marketing with GetResponse, from setting up your account to creating successful campaigns. By the end of this tutorial, you’ll have a clear understanding of how to leverage GetResponse’s powerful features to boost your business’s growth.
Table of Contents
Why Choose GetResponse for Email Marketing?
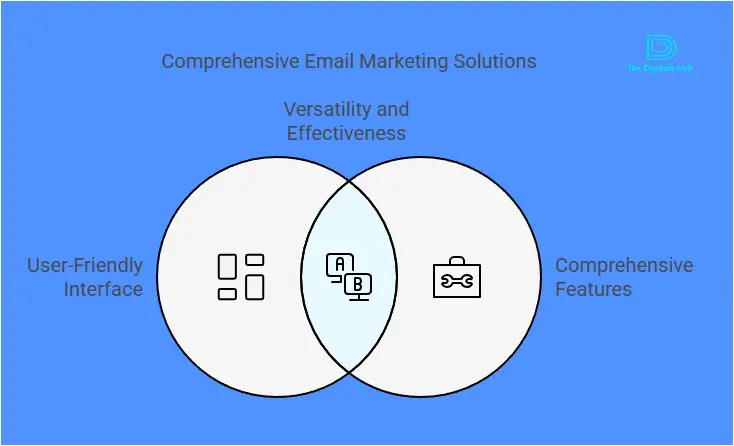
Before we get into the tutorial, let’s first take a moment to understand why GetResponse is a great choice for email marketing.
- Ease of Use: GetResponse is known for its user-friendly interface, making it easy for beginners to set up email campaigns without any technical knowledge.
- Automation Features: GetResponse has powerful automation tools that can save you time and effort by automating your email workflows.
Responsive Templates: GetResponse offers a wide variety of pre-designed email templates that are mobile-responsive, ensuring your emails look great on all devices. - Detailed Analytics: Track your campaigns’ performance with comprehensive analytics and reports to help you make data-driven decisions.
- All-in-One Solution: GetResponse goes beyond email marketing with features like landing page creation, webinars, and customer relationship management (CRM).
Now that you understand why GetResponse is a solid choice, let’s dive into the email marketing tutorial.
How to Get Started with GetResponse
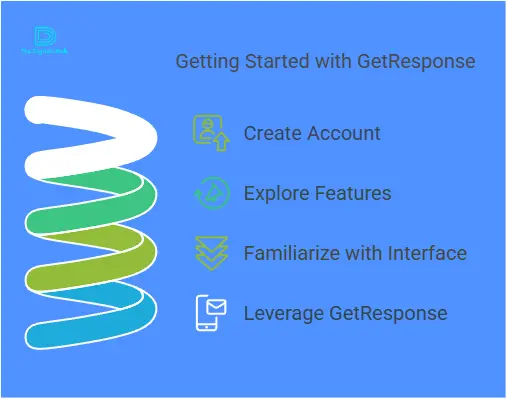
Step 1: Sign Up for GetResponse
To get started, you’ll first need to sign up for a GetResponse account. They offer a 30-day free trial, so you can explore all the features without committing to a paid plan.
- Visit the GetResponse website.
- Click on the “Start Free Trial” button.
- Enter your email address and create a password, or sign up using Google.
- Fill out some basic information, such as your name and business details.
Once you’ve signed up, you can start exploring the platform and setting up your account.
Step 2: Set Up Your Account
After signing up, you’ll be prompted to set up your account. Here’s how:
1. Define Your Business Information: Provide details about your business, including your company name, website (if applicable), and business goals.
- Choose Your Email Preferences: Set your email preferences, such as your default time zone and the sender email address.
- Add Your Contact List: Upload your email list or manually add contacts if you have them. You can also import contacts from other platforms, like Mailchimp or Excel files.
- Create a Signup Form: Set up a signup form to start collecting new subscribers for your email list.
Once these steps are completed, you’re ready to start creating your first campaign!
Step 3: Create an Email Campaign

Now that your account is set up and you have your contacts, it’s time to create your first email campaign. Here’s how:
- Choose a Campaign Type
GetResponse offers several campaign types to suit different needs:
- Regular Campaigns: These are standard email campaigns that you can send to a group of subscribers.
- Autoresponders: Automatically send emails to subscribers at set intervals.
- A/B Testing: Test different versions of an email to determine which one performs best.
For this tutorial, we’ll focus on creating a regular email campaign.
- Create Your Email
Once you’ve selected the campaign type, it’s time to create your email: - Choose a Template: GetResponse offers a variety of responsive, pre-designed email templates to choose from. Whether you want a simple design or something more elaborate, there’s a template for you.
- Customize Your Email: Use the drag-and-drop editor to add elements like text, images, buttons, and social media links. You can also personalize your email by including your subscriber’s first name, company name, etc.
- Add a Call to Action: Every email should have a clear call to action (CTA) that tells your subscribers what you want them to do next (e.g., visit your website, purchase a product, or sign up for a webinar).
- Set Your Campaign Details
After designing your email, you’ll need to set some key details for your campaign:
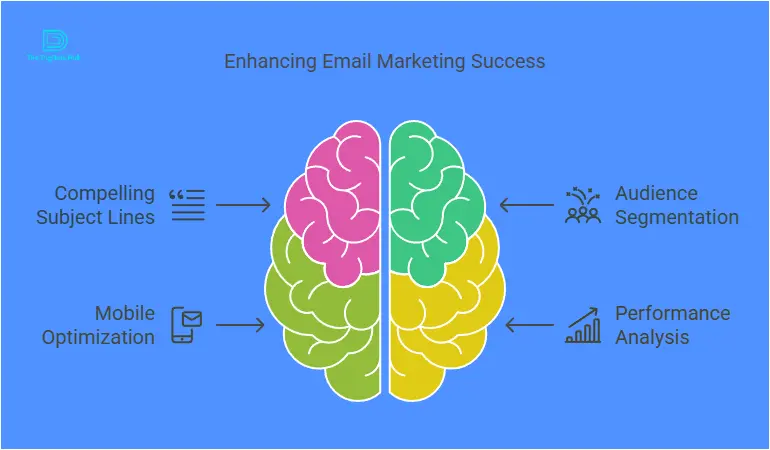
- Subject Line: This is the first thing your subscribers will see in their inbox, so make it compelling. Keep it short, clear, and intriguing.
- Sender Information: Set the “From” name and email address. Make sure it’s recognizable to your subscribers.
- Tracking: Enable tracking options to measure the effectiveness of your campaign. GetResponse allows you to track open rates, click-through rates, and other important metrics.
Email Segmentation: If you have a large email list, you can segment it based on factors like demographics, behavior, and engagement. This will allow you to send more targeted and relevant emails.
- Review & Send Your Email
Before hitting the send button, make sure to preview your email and test it by sending a test email to yourself. This will ensure everything looks good and that there are no mistakes.
Once you’re happy with the email, you can either send it immediately or schedule it to be sent at a later time.
Step 4: Automate Your Emails
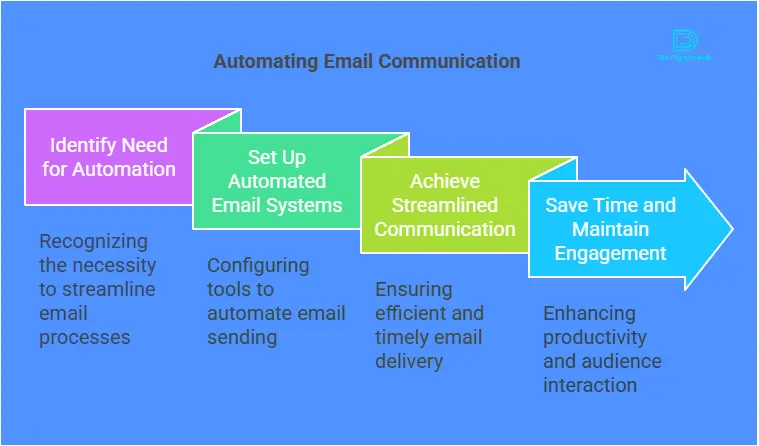
One of the most powerful features of GetResponse is its automation capabilities. With automation, you can create workflows that trigger emails based on specific actions or behaviors. For example, you can set up an automated series to welcome new subscribers, nurture leads, or recover abandoned carts.
Here’s how to set up an email automation workflow:
- Create a Workflow
- Go to the “Automation” section in your GetResponse dashboard.
- Choose “Create Workflow”.
- You’ll be taken to a workflow builder where you can add triggers, actions, and conditions.
- Set Triggers
Triggers are events that cause an automated action to occur. For example:
Subscription: Send a welcome email when someone subscribes to your list.
- Link Click: Send a follow-up email when someone clicks on a specific link in your email.
- Product Purchase: Send an email when someone purchases from your store.
- Add Actions
Actions are the steps that happen once a trigger is activated. For example, you might want to send an email, add a tag to a subscriber, or send an SMS.
- Customize the Workflow
You can add multiple steps to your workflow, including delays, filters, and different actions depending on the subscriber’s behavior.
Once you’ve set up your workflow, GetResponse will automatically send emails to your subscribers based on their behavior or actions, allowing you to nurture your audience and drive more conversions.
Step 5: Analyze Your Campaign Performance
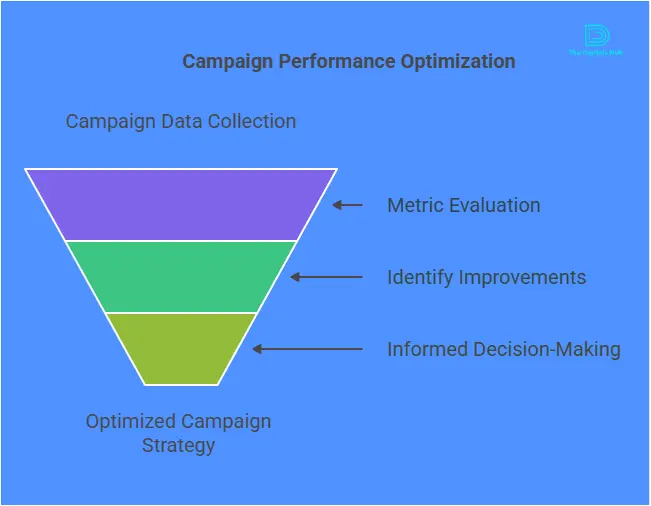
After sending your campaign, it’s crucial to track its performance and see how well it performed. GetResponse provides detailed analytics to help you understand how your emails are performing.
Key Metrics to Track:
- Open Rate: The percentage of people who opened your email.
- Click-Through Rate (CTR): The percentage of people who clicked on links in your email.
- Bounce Rate: The percentage of emails that couldn’t be delivered.
Unsubscribe Rate: The percentage of people who unsubscribed after receiving your email. - Conversion Rate: The percentage of people who took the desired action (e.g., making a purchase).
By reviewing these metrics, you can optimize future campaigns for better results.
Best Practices for Successful Email Marketing with GetResponse
Now that you know how to create, automate, and analyze email campaigns with GetResponse, let’s go over some best practices to ensure your email marketing success:
- Personalize Your Emails: Use your subscriber’s name and tailor the content to their interests.
- Keep Subject Lines Short and Engaging: Your subject line is the first thing recipients see. Make it clear, catchy, and relevant to the email content.
- Use High-Quality Visuals: Include attractive images, GIFs, and videos to make your emails visually appealing.
- Segment Your Email List: Group your subscribers based on interests, behaviors, and engagement to send targeted emails.
- Test and Optimize: Use A/B testing to try different subject lines, images, and CTAs to see what works best.
- Ensure Mobile Optimization: Make sure your emails are mobile-friendly since a significant portion of email opens happen on mobile devices.
Conclusion
GetResponse is an incredibly powerful tool for email marketing that offers everything you need to create effective campaigns, automate your workflows, and analyze your results. By following this tutorial, you’ll be able to harness the full potential of GetResponse to grow your business, engage with your audience, and drive conversions.
Don’t forget to experiment, test, and analyze your campaigns to keep improving and fine-tuning your email marketing strategy. The more you learn about your audience and their preferences, the better your campaigns will perform.
So, are you ready to get started? Sign up for GetResponse today, and start building your successful email marketing campaigns!
Sign up for GetResponse to begin your email marketing journey!
Recent Comments